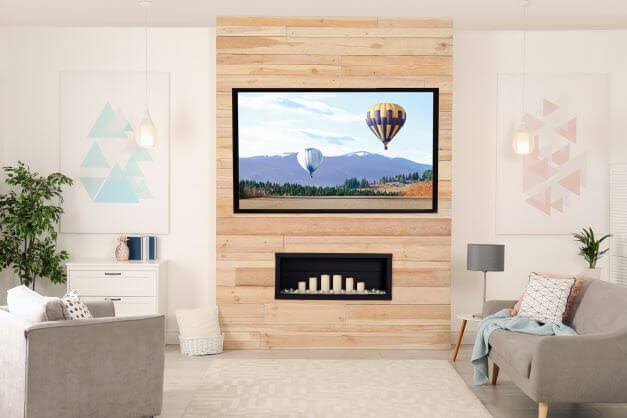
A media wall can be a stunning and functional centerpiece in your living space, combining your TV, sound system, and decor in a sleek, stylish way. Whether you want to create an immersive home theater experience or simply have an organized, eye-catching setup, a well-designed media wall can enhance your home’s aesthetics and entertainment experience.
Step 1: Plan the Design
Before jumping into construction, take some time to plan your media wall design. Consider the following factors:
- Size of the Room: The size of your media wall should complement the dimensions of the room. For example, a large wall works best in a spacious living area, while a smaller media wall might be more suitable for a bedroom or cozy den.
- TV Placement: Centralize your TV for optimal viewing angles. Make sure it’s at eye level when seated.
- Storage Needs: Decide if you want built-in shelves, cabinets, or drawers to hide unsightly cables, gaming consoles, and media players.
- Aesthetic Preferences: Determine your desired look. Do you prefer a minimalist, modern design with clean lines, or something more traditional with built-in woodwork and ornate details?
- Budget: Set a budget before you begin, as the cost can vary significantly depending on the materials and technology involved.
Step 2: Choose Materials and Finishes
Once you’ve solidified the design, select materials and finishes that will complement your home decor. Here are some popular options:
- Wood Panels: Create a warm, rustic look with natural wood paneling or wood veneer.
- Stone or Brick: For a more dramatic, industrial vibe, consider using stone, brick, or faux brick.
- Drywall: Drywall can be used to create a smooth, modern media wall that blends seamlessly into the rest of your room.
- LED Lighting: Add a touch of sophistication with recessed LED lighting around your TV or shelving for a soft, ambient glow.
Step 3: Install the TV and Equipment
Before installing the TV, ensure that you have the necessary mounting equipment and the right cables for your electronics. You can find everything you need for this at Powerpoint Electrical in Sutton. Follow these steps:
- Mount the TV: Use a sturdy wall mount to secure your TV at eye level. Be sure to mount it to wall studs to ensure it can support the weight.
- Conceal the Cables: Use cable management systems or install conduit pipes behind the wall to hide unsightly wires. This keeps the look sleek and clutter-free.
- Set Up Surround Sound: If you’re installing speakers, position them to optimize sound quality. Built-in or wall-mounted speakers can save space and enhance the room’s acoustics.
- Connect Streaming Devices: Whether it’s a gaming console, Apple TV, or streaming device, make sure everything is wired properly and tucked away in hidden compartments or shelves.
Step 4: Add Custom Features
Customize your media wall to suit your style and practical needs. Some options include:
- Shelving: Install open or closed shelves for books, decor, or sound systems.
- Fireplace: Add an electric fireplace for a cozy touch.
- Artwork and Decor: Decorate the space around the TV with framed artwork, plants, or other decorative items that enhance the overall look.
Step 5: Finishing Touches
Once the heavy work is done, finish by ensuring that the wall is balanced and appealing.
- Paint or Stain: If you’re using drywall or wood, make sure to paint or stain it to match the room’s design.
- Lighting: Ensure that the LED lights are functional and provide the ambiance you desire.
Whether you opt for a minimalist modern look or a grand, multi-functional media unit, a media wall can elevate both your home’s decor and your viewing experience.
Also Read: How to Plan the Perfect Date Night


